A full car service checklist outlines essential maintenance tasks to ensure vehicle reliability and prevent issues. Scheduled every 6 months or 5,000–7,500 miles, it aligns with your car’s manual.
Importance of Regular Car Maintenance
Regular car maintenance ensures optimal performance, safety, and longevity. It identifies potential issues early, preventing costly repairs. A full car service checklist helps track essential tasks like oil changes, brake inspections, and fluid checks, ensuring reliability. By following a structured schedule aligned with your vehicle’s manual, you maintain its health, enhance fuel efficiency, and uphold its value over time. Consistent upkeep also improves road safety and reduces unexpected breakdowns.
What is a Full Car Service Checklist?
A full car service checklist is a detailed guide outlining essential maintenance tasks for vehicle upkeep. It covers inspections and replacements, such as oil changes, tire checks, and brake inspections. Designed for regular intervals—every 6 months or 5,000–7,500 miles—it ensures all systems are evaluated. The checklist includes exterior, interior, and under-the-hood checks, as well as brake, suspension, and electrical system inspections. It provides a structured approach to maintaining your car’s health and performance over time.
Why You Need a Full Car Service Checklist PDF
A full car service checklist PDF provides a structured and organized approach to maintaining your vehicle. It ensures no critical checks are missed, helping you stay on top of essential tasks. By following the checklist, you can identify potential issues early, reducing repair costs and extending your car’s lifespan. It also serves as a handy reference, aligning with your owner’s manual and service history for a personalized maintenance plan.

Exterior Checks
Exterior checks ensure your car’s external components are in good condition. Inspect tires for pressure, tread, and damage; check lights for functionality; and examine bodywork for dents or rust.
Tires: Pressure, Tread, and Damage Inspection
Tires are crucial for safety and performance. Check tire pressure using a gauge, ensuring it matches the manufacturer’s specifications. Inspect the tread depth using a penny test—insert the penny into the tread groove with Lincoln’s head down; if you can see the top of his head, the tread is worn. Also, look for signs of damage such as cracks, bulges, or punctures. Proper tire maintenance improves fuel efficiency, handling, and reduces the risk of blowouts. Regular inspections ensure even wear and extend the life of your tires. Make sure to check the spare tire as well, ensuring it is inflated and in good condition. If any issues are found, address them promptly to maintain optimal vehicle performance and safety on the road. Always refer to your vehicle’s owner’s manual for specific guidelines and recommendations. Remember, well-maintained tires contribute significantly to overall vehicle reliability and driver safety.
Lights: Headlights, Brake Lights, and Indicators
Ensure all exterior lights are functioning properly for safety and legality. Test headlights, both high and low beams, to confirm they are bright and free from damage. Check brake lights by pressing the pedal and observing if they illuminate correctly. Indicators, including turn signals and hazard lights, should flash at the correct rate and be visible from a distance. Replace any faulty bulbs or repair damaged lenses promptly to avoid visibility issues and potential legal penalties. Clean lenses regularly to maintain light effectiveness. Properly functioning lights are essential for clear communication with other road users and to prevent accidents. Always refer to your vehicle’s manual for specific instructions on replacing bulbs and ensuring all lighting systems are in optimal condition. Regular checks can prevent failures and ensure your vehicle remains roadworthy. Additionally, consider using LED bulbs for brighter and longer-lasting illumination. If any light malfunctions, address it immediately to maintain safety and compliance with traffic regulations. Remember, functional lights are a critical aspect of vehicle maintenance and road safety. They help you see and be seen, reducing the risk of accidents, especially at night or in low-visibility conditions. Stay proactive with light inspections to protect yourself and others on the road.
Windshield and Wipers: Condition and Functionality
Inspect the windshield for cracks, chips, or other damage that could obstruct visibility. Ensure wiper blades are free from wear and tear, replacing them if necessary. Test the windshield washer to confirm proper function and fluid level. Clean the windshield and wipers regularly to maintain clarity. Address any issues promptly, as compromised visibility can lead to accidents. Always check for proper wiper alignment and functionality during rain or snow conditions to ensure safety on the road.
Bodywork: Dents, Scratches, and Rust Spots
Inspect the car’s bodywork for dents, scratches, or rust spots, paying attention to areas prone to moisture. Address any damage promptly to prevent rust from spreading. Check for paint damage or fading and ensure all trim and moldings are securely fastened. Regular cleaning and waxing can protect the finish. If rust is found, treat it immediately to avoid structural weakening. A well-maintained bodywork enhances both safety and the vehicle’s appearance, ensuring longevity and preventing costly repairs. Always document findings for future reference.
Interior Checks
Inspect seats, seatbelts, dashboard warning lights, and heating systems. Check the steering wheel alignment, interior lights, and overall cabin condition for functionality and safety.
Seats and Seatbelts: Adjustment and Safety
Ensure seats are securely adjusted, functioning properly, and free from damage. Check seatbelts for proper latching, smooth retraction, and signs of wear or fraying. Verify that all seatbelt buckles and retractors operate correctly. Test the seatbelt lockability for child seats and ensure no obstructions hinder their use. Inspect seat cushions and upholstery for tears or excessive wear. Confirm that seat adjustments (tilt, recline, slide) are functioning smoothly. Replace any damaged or worn components to ensure occupant safety and comfort.
Dashboard: Warning Lights and Instrument Cluster
Inspect all dashboard warning lights to ensure they illuminate properly during startup and turn off once the engine is running. Check the instrument cluster for accurate readings on speed, RPM, temperature, and fuel levels. Verify that all gauges function smoothly and consistently. Look for any flickering, dimming, or malfunctioning lights. Test all buttons and controls on the dashboard to ensure they respond correctly. Check for any error messages or codes displayed on the cluster. Ensure the brightness and contrast settings are adjustable and functioning as intended.
Steering Wheel: Alignment and Wear
Inspect the steering wheel for any signs of wear or damage, such as cracks, fraying, or loose stitching. Ensure proper alignment by checking that the wheel is centered and straight when driving. Test the steering wheel’s responsiveness and make sure it turns smoothly in both directions. Check for any unusual vibrations or play in the wheel. Verify that all controls mounted on the steering wheel, such as cruise control or audio buttons, are functioning correctly. Also, inspect the airbag module for any visible damage or warning lights.
Heating and Cooling Systems: Functionality Check
Inspect the heating and cooling systems to ensure proper functionality. Check the heater for consistent warm air output and the air conditioning for cool air. Test temperature controls to ensure they regulate evenly. Look for any leaks or unusual odors from the vents. Verify that all heating and cooling functions operate without noise or vibrations. Ensure the defrost and recirculation modes are working correctly. Also, check for any visible damage to hoses or connections in the system.
Interior Lights: Dashboard, Door, and Trunk Lights
Check the functionality of all interior lights, including the dashboard, door, and trunk lights. Ensure they illuminate and dim properly. Verify that all lights turn on and off as expected. Inspect for any flickering, dimming, or complete loss of light. Check for worn-out bulbs, faulty switches, or damaged wiring. Replace any non-functional bulbs and repair or replace faulty components to maintain visibility and safety within the vehicle.
Under the Hood Checks
Inspect the engine oil, coolant, air filter, serpentine belt, and hoses. Check for leaks, wear, and proper fluid levels to ensure optimal performance and efficiency.
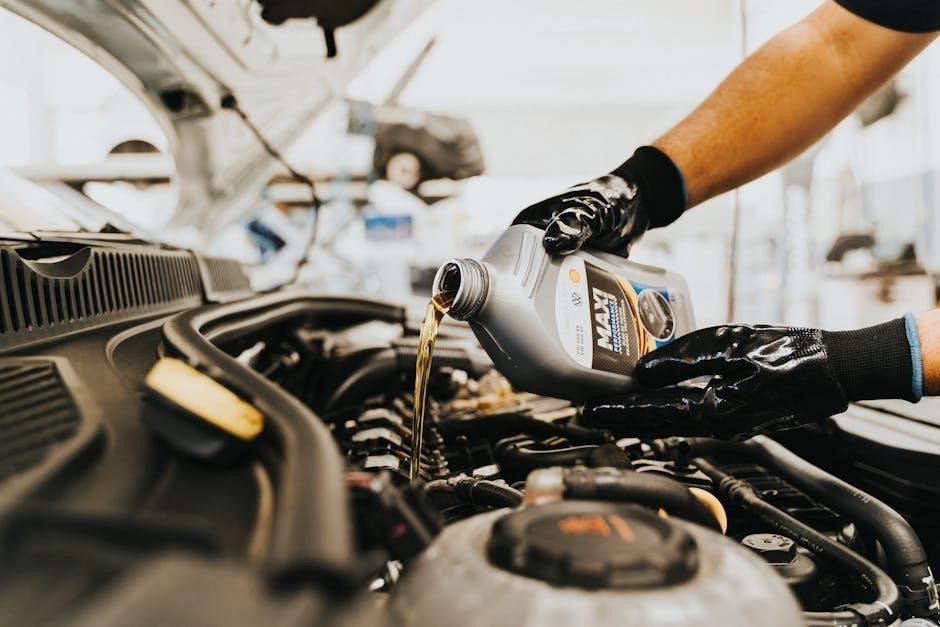
Engine Oil: Level, Color, and Filter Condition
Check the engine oil level using the dipstick; ensure it’s within the recommended range. Inspect the oil color—it should be amber or brown, not black or milky. The oil filter should be free of leaks and cleaned or replaced as needed. Proper oil condition ensures engine lubrication and longevity. Always refer to the owner’s manual for specific guidelines and recommendations. A well-maintained oil system prevents overheating and premature wear on engine components.
Coolant: Level, Color, and Leaks
Check the coolant level in the reservoir, ensuring it’s between the minimum and maximum marks. The coolant should be green, yellow, or orange, depending on the type. Inspect for leaks around the radiator, hoses, and water pump. Ensure the coolant-to-water ratio is correct to prevent corrosion and maintain proper boiling and freezing points. Avoid mixing different coolant types, as this can cause chemical reactions and system damage. Regular checks prevent overheating and engine damage.
Air Filter: Inspection and Replacement
Inspect the air filter for dirt, dust, or damage. A dirty or clogged filter can reduce fuel efficiency and performance. Check for tears, holes, or excessive debris. If contaminated, replace it with a new one. Ensure the filter is properly seated to prevent air leaks. Refer to the manufacturer’s guidelines for recommended replacement intervals, typically every 15,000 to 30,000 miles. A clean air filter improves engine airflow and overall vehicle performance.
Serpentine Belt: Condition and Tension
Inspect the serpentine belt for cracks, frays, or excessive wear. Check for proper tension by pressing on the belt; it should have minimal give. Ensure the belt is free from contamination like oil or grease. Look for signs of misalignment, such as uneven wear patterns. If damaged or loose, replace the belt immediately. Refer to the manufacturer’s guide for replacement intervals, typically every 50,000 to 90,000 miles, to maintain optimal performance and avoid costly repairs.
Hoses: Cracks, Leaks, and Flexibility
Inspect all hoses for visible cracks, leaks, or signs of wear. Ensure they remain flexible and not brittle. Check connections for tightness and any signs of leakage. Replace any damaged or aged hoses immediately to prevent fluid loss. Follow the manufacturer’s recommended replacement schedule, typically every 5 years or 50,000 miles. Properly functioning hoses are essential for maintaining coolant, brake, and power steering systems. Always consult the vehicle’s service manual for specific guidance.
Braking System
The braking system is crucial for safety. Regular inspection ensures all components function correctly, preventing potential accidents and maintaining vehicle control.
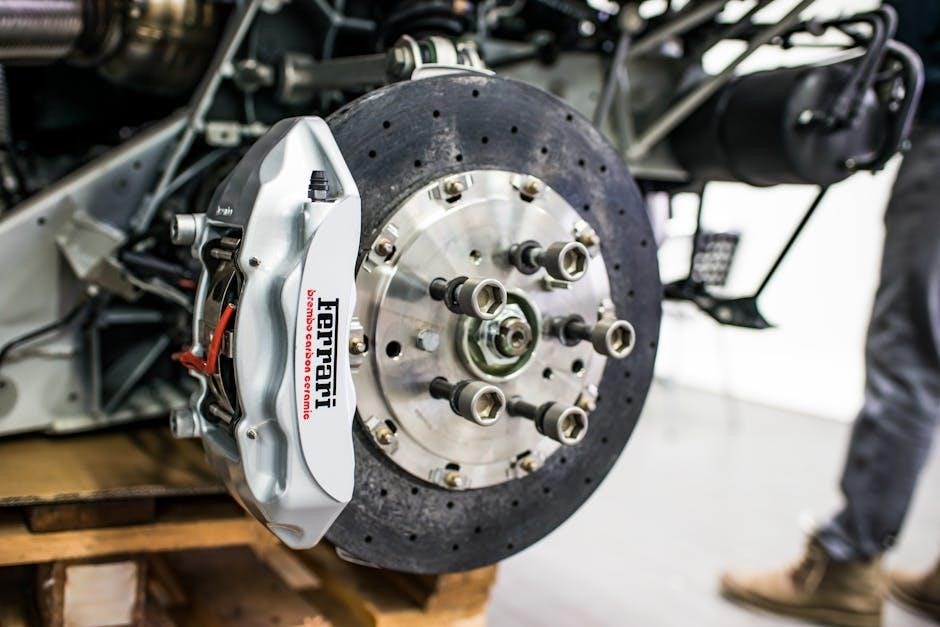
Front Brakes: Pads, Rotors, and Calipers
Inspect front brake pads for wear, ensuring thickness meets minimum safety standards. Check rotors for excessive warping or scoring. Calipers should operate smoothly without leaks. Measure pad thickness and look for uneven wear. Clean or replace components as needed. Ensure rotor surfaces are free from damage. Properly lubricate caliper pins for smooth operation. Address any issues promptly to maintain effective braking performance and safety on the road. Always refer to manufacturer guidelines for specifications.
Rear Brakes: Pads, Rotors, and Drum Condition
Inspect rear brake pads for wear, ensuring thickness meets safety standards. Check rotors for scoring or excessive wear. Examine drum condition for cracks or damage. Measure pad thickness and look for uneven wear. Clean or replace components as needed. Ensure rotor surfaces are free from damage. Properly lubricate drum brakes for smooth operation. Address any issues promptly to maintain effective braking performance and safety on the road. Always refer to manufacturer guidelines for specifications.
Handbrake: Cable Tension and Functionality
Check the handbrake’s cable tension and ensure proper functionality. Test the handbrake by engaging it and verifying the vehicle remains stationary on an incline. Inspect cables for frays, corrosion, or damage. Adjust tension if necessary to maintain optimal braking performance. Ensure the handbrake lever operates smoothly and holds securely. Replace worn or damaged components to prevent failure. A well-maintained handbrake is crucial for safety, especially in emergency situations or when parking on slopes.

Transmission and Suspension
Inspect the transmission fluid level and condition. Check suspension components like shock absorbers and springs for wear. Ensure smooth gear shifting and ride comfort. Regular checks ensure optimal performance and safety.
Transmission Fluid: Level and Condition
Check the transmission fluid level using the dipstick, ensuring it meets the manufacturer’s recommended level. Inspect the fluid’s color and consistency; it should be clear or amber-colored, not dark or gritty. Look for signs of degradation, such as a burnt smell or milky texture, which indicate contamination or wear. Top up if necessary, but avoid overfilling. If issues are found, consult a mechanic for further inspection or fluid replacement to maintain smooth gear transitions and prevent costly repairs.
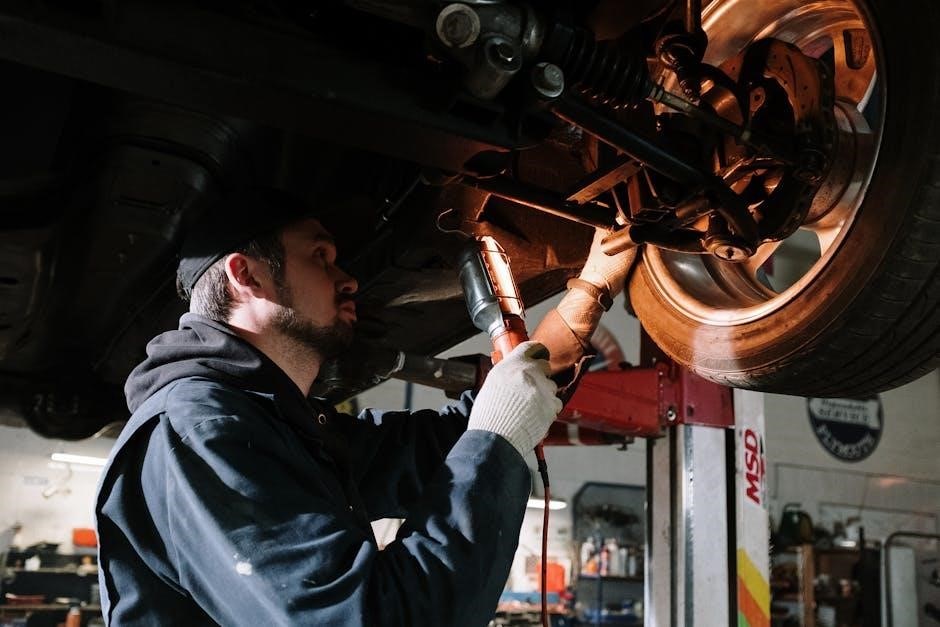
Suspension: Shock Absorbers and Springs
Inspect the shock absorbers for leaks, dents, or damage. Check the springs for sagging, corrosion, or breaks. Perform a bounce test by pressing down on the vehicle’s bumper and releasing it; it should return to its normal position smoothly. If it bounces repeatedly, the shocks may be worn. Also, look for uneven tire wear, which can indicate suspension misalignment. Address any issues promptly to ensure stable handling and ride comfort.

Wheels and Tires

Check tire pressure, tread depth, and look for uneven wear. Inspect wheels for damage or corrosion. Ensure wheel nuts are tightened to the recommended torque specification.
Wheel Nuts: Tightness and Torque
Ensure all wheel nuts are tightened to the manufacturer’s recommended torque specification using a torque wrench. This crucial step maintains wheel security, prevents damage, and ensures even tire wear. Proper torque prevents safety hazards and guarantees optimal vehicle performance. Always refer to your vehicle’s service manual for precise torque values. Visual inspection for any signs of loosening or damage is also essential for regularly maintaining safety and reliability.
Hub Bearings: Inspection and Lubrication
Inspect hub bearings for excessive wear, noise, or vibration during operation. Lubricate with high-quality grease to ensure smooth wheel rotation and prevent overheating. Check for proper bearing preload and alignment. Replace worn or damaged bearings promptly to avoid wheel instability. Always consult the vehicle’s service manual for specific lubrication intervals and procedures to maintain optimal performance and safety.

Electrical System
Check battery health, alternator function, and wiring integrity. Test lights, fuses, and electrical connections to ensure proper functionality and safety. Inspect for worn or damaged components.
Battery: Charge, Terminals, and Age
The battery is a critical component of the electrical system. Check its charge level using a multimeter and ensure terminals are clean and securely connected. Inspect for corrosion, which can drain power and cause starting issues. Verify the battery’s age, as most last 5-7 years. Look for signs of aging, such as swelling or leaks. Replace the battery if it shows significant wear or fails a load test to prevent unexpected breakdowns and ensure reliable starting performance.
Alternator: Belt and Charging Function
Inspect the serpentine belt for cracks, wear, or misalignment, as it powers the alternator. Check the belt’s tension to ensure proper grip and avoid slippage. Test the alternator’s charging function using a multimeter to verify voltage output (typically 13-14.5V). Ensure connections are clean and secure. A faulty alternator or belt can lead to electrical failures, so address any issues promptly to maintain reliable power supply and prevent battery drainage during operation.

Wiring: Insulation and Connectivity
Inspect wiring for signs of damage, wear, or corrosion. Check insulation integrity to prevent short circuits. Ensure all connections are secure and tight. Use a multimeter to test conductivity and identify any open circuits. Address any frayed wires or loose terminals promptly. Proper wiring ensures reliable electrical system performance, preventing malfunctions in lights, sensors, and other critical components. Regular checks help avoid costly repairs and maintain overall vehicle safety and functionality effectively.
Exhaust System

Inspect the exhaust pipe for leaks, damage, or corrosion. Check the muffler for holes, dents, or excessive noise. Ensure proper exhaust system functionality for optimal performance and emissions.
Exhaust Pipe: Leaks and Damage
Inspect the exhaust pipe for leaks, damage, or corrosion. Check for loose connections and signs of wear. Visually examine the entire length for dents, holes, or rust. Ensure there are no blockages or restrictions. Leaks can lead to reduced performance, increased emissions, and safety risks. Address any damage promptly to maintain proper exhaust flow and prevent fumes from entering the cabin. Tighten loose components and replace damaged sections as needed. A damaged exhaust system can lead to costly repairs if neglected.
Muffler: Condition and Noise Levels
Inspect the muffler for dents, rust, or holes that could cause leaks. Check for excessive noise, such as rumbling or hissing sounds, which may indicate damage or wear. Ensure the muffler is securely mounted and free from corrosion. A damaged muffler can increase noise levels, reduce fuel efficiency, and lead to failed emissions tests. Replace the muffler if necessary to maintain performance and minimize environmental impact. Addressing issues early prevents costly repairs.
Final Checks
Ensure all repairs are verified and documented. Conduct a final inspection to confirm everything is in order before returning the vehicle to the owner.
Road Test: Performance and Handling
A road test evaluates the vehicle’s overall performance, acceleration, and braking efficiency. Check for smooth gear transitions in automatics or clutch engagement in manuals. Test steering alignment and suspension stability by driving straight and turning. Listen for unusual noises during acceleration or braking. Ensure the vehicle tracks evenly without pulling to one side. This step confirms all systems function correctly and provides a final assurance of the vehicle’s reliability and safety on the road.
Service Report: Documentation and Recommendations
A detailed service report is essential for transparency, outlining all checks performed and any issues identified. Use bullet points for clarity, noting repairs completed and those recommended. Include technician notes and prioritized recommendations. This document serves as a record of the service and helps plan future maintenance. Ensure the report is signed and dated, with a copy provided to the vehicle owner for their records and reference.