
GeekVape Aegis devices, as detailed in user manuals from Vaper Club, power on displaying a boot animation screen. These robust vapes offer diverse features and models.
What is the GeekVape Aegis?
The GeekVape Aegis is a popular line of vape devices known for their durability and shock resistance. As highlighted in Vaper Club’s user manuals, powering on an Aegis device initiates a boot animation on the display screen. These vapes cater to both beginners and experienced users, offering a blend of advanced features and user-friendly operation. The series has evolved through iterations like the Legend and Boost, each building upon the previous model’s strengths.
Aegis Vape Series Overview (Legend, Boost, etc.)
The GeekVape Aegis series showcases continuous innovation. The original Aegis Legend set the standard for rugged vapes, while subsequent models like the Aegis Boost introduced pod-mod versatility. User manuals from Vaper Club consistently mention the boot animation upon powering on. Each iteration refines the design and functionality, offering varied power outputs and compatibility with different coil types, catering to diverse vaping preferences and styles.

Getting Started with Your Aegis Vape
Initial setup involves checking all components and, for Aegis Legend models, correctly installing batteries before the device powers on with its animation.
Unboxing and Component Check
Upon receiving your GeekVape Aegis, carefully inspect the packaging for any damage during transit. The standard kit typically includes the Aegis device itself, a compatible pod or tank, a USB-C charging cable, a coil (or coils), and a user manual – as referenced by Vaper Club resources. Verify the presence of all listed components.
Ensure the device appears physically undamaged. If anything is missing or appears faulty, immediately contact the retailer or GeekVape support for assistance. Retain the original packaging for potential warranty claims.
Battery Installation (Aegis Legend Models)
Aegis Legend models require separate 18650 batteries (sold separately). Locate the battery compartment on the back of the device. Gently slide the battery door open. Observe the polarity markings (+ and -) inside the compartment and insert the batteries accordingly. Ensure they fit snugly and securely.
Close the battery door firmly. Incorrect battery installation can damage the device or pose a safety risk. Always use high-quality, matched batteries for optimal performance and longevity.
Charging the Device
Connect your GeekVape Aegis to a USB power source using a compatible USB cable (typically USB-C). The device will display a charging indicator on the screen. Avoid using fast chargers or exceeding 5V/2A, as this could damage the battery.
Allow the device to charge fully before use. Do not use the device while it is charging. Once fully charged, disconnect the cable. Proper charging practices extend battery life and ensure safe operation.

Understanding the Aegis Vape Interface
The GeekVape Aegis interface features a display screen and buttons for power, up/down adjustments, and selection, enabling menu navigation and setting customization.
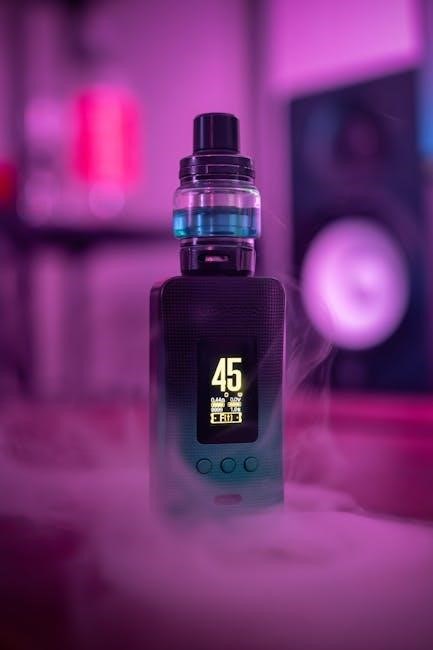
Display Screen Explanation
The Aegis vape’s display, as noted in Vaper Club’s user manuals, illuminates with a boot animation upon powering on; This screen provides crucial vaping information, including wattage levels, battery life indicators, coil resistance, and selected vaping mode. Users can easily monitor their e-liquid levels and access advanced settings through the intuitive interface. Brightness adjustments are often available for optimal visibility in various lighting conditions, enhancing the overall user experience and ensuring clear data presentation.
Button Functions (Power, Up, Down, Select)
Aegis vape operation relies on key buttons. The Power button, as detailed in Vaper Club manuals, activates the device and confirms selections. Up and Down buttons adjust settings like wattage or temperature. The Select button navigates menus and changes options. Holding combinations of these buttons often accesses advanced features or locks the device, preventing accidental adjustments. Understanding these functions is crucial for customizing your vaping experience and safely operating the device.
Navigating the Menu System
The Aegis vape’s menu, referenced in Vaper Club’s guides, is accessed via button combinations. Utilize the Up, Down, and Select buttons to scroll through options like wattage mode, temperature control, and settings adjustments. The Power button confirms each selection. Familiarize yourself with the menu structure to personalize your vaping experience. Expect options for user profiles, screen brightness, and firmware updates within the intuitive interface.
Vaping Modes Explained
GeekVape Aegis vapes support Power (VW), Temperature Control (TC), Bypass, and Smart modes, offering versatile vaping experiences tailored to user preferences and coil types.
Power Mode (VW)
Power Mode (VW) on the GeekVape Aegis allows users to select a specific wattage level for a consistent and straightforward vaping experience. This mode is ideal for beginners and those who prefer simplicity. Adjust the wattage using the Up and Down buttons to find your preferred vapor production and flavor intensity.
Remember to start with a lower wattage and gradually increase it to avoid a harsh or burnt taste. VW mode bypasses temperature control, delivering power directly to the coil based on your set wattage.
Temperature Control (TC) Mode
Temperature Control (TC) Mode on the GeekVape Aegis allows precise control over the coil’s temperature, preventing dry hits and maximizing flavor. This mode requires compatible coils and e-liquids with known nickel, titanium, or stainless steel content.
Set your desired temperature and wattage, and the device will maintain that temperature by adjusting power output. TC mode is beneficial for experienced vapers seeking customized vaping and extended coil life.
Bypass Mode
Bypass Mode on the GeekVape Aegis delivers a direct voltage output from the battery to the coil, similar to a mechanical mod but with built-in safety features. This mode provides a powerful and responsive vaping experience, ideal for users who prefer a more raw and unfiltered hit.
However, it’s crucial to understand battery safety and coil resistance when using Bypass Mode, as it doesn’t regulate wattage.
Smart Mode
Smart Mode automatically detects the installed coil’s resistance and suggests a suitable wattage range for optimal performance. This feature simplifies the vaping experience, particularly for beginners, eliminating the guesswork of finding the ideal wattage setting.
The Aegis intelligently adjusts power output, ensuring a balanced flavor and vapor production without requiring manual adjustments, enhancing user convenience.
Coil Installation and Replacement
Coil installation involves selecting compatible types and following a specific procedure, ensuring a secure fit. Priming a new coil before use is also crucial.
Compatible Coil Types
GeekVape Aegis vapes support a variety of coil types, catering to diverse vaping preferences. These typically include mesh coils for enhanced flavor and vapor production, and standard round wire coils for a more traditional experience. Different resistance levels are available, ranging from sub-ohm coils for direct-to-lung vaping to higher resistance coils suitable for mouth-to-lung styles.
Consult your device’s manual or the GeekVape website to confirm compatibility with specific coil series, such as the P-series or B-series, ensuring optimal performance and safety.
Coil Installation Procedure
To install a coil in your GeekVape Aegis, begin by gently removing the pod or tank from the device. Unscrew or detach the old coil (if present). Take a new compatible coil and carefully align it with the coil slots within the pod/tank. Gently push the coil into place until securely seated. Reattach the pod/tank to the device, ensuring a snug fit.
Always refer to your device’s manual for specific instructions, as procedures may vary slightly between models.
Priming a New Coil
Priming a new coil is crucial for optimal flavor and longevity. After installation, add a few drops of e-liquid directly onto the cotton wicking within the coil. Allow the e-liquid to saturate the cotton for approximately 5-10 minutes. This prevents dry hits and extends the coil’s lifespan.
Avoid vaping immediately after installation; let the coil fully absorb the liquid before use. Refer to your device’s manual for specific recommendations.

E-Liquid Filling and Pod/Tank Usage
Proper e-liquid filling and pod/tank usage are essential for a satisfying vape experience. Always choose high-quality e-liquids and avoid overfilling to prevent leaks.
Filling the Pod/Tank
To fill your Aegis pod or tank, carefully locate the filling port, usually accessed by removing a side or bottom cap. Gently insert the e-liquid nozzle and slowly fill, avoiding air bubbles. Do not overfill, leaving a small gap to prevent leakage when the pod/tank is sealed. After filling, securely close the cap and wipe away any spilled e-liquid. Allow a few minutes for the e-liquid to saturate the coil before vaping, a process known as priming.
Choosing the Right E-Liquid
Selecting the ideal e-liquid for your GeekVape Aegis involves considering nicotine strength, PG/VG ratio, and flavor profile. Higher VG ratios produce more vapor, while higher PG delivers a stronger throat hit. Match the e-liquid to your coil resistance; lower resistances pair well with higher VG. Start with a lower nicotine strength if you’re new to vaping, and always use high-quality e-liquids from reputable brands to ensure a safe and enjoyable experience.
Avoiding Leaks and Spills
Preventing leaks with your GeekVape Aegis requires careful attention. Ensure the pod or tank is securely attached and the coil is properly installed. Avoid overfilling the tank/pod, and wipe away any condensation that forms. When transporting the device, consider removing the pod or closing the airflow valve. Regularly inspect O-rings for damage and replace them as needed to maintain a tight seal and prevent messy spills.
Safety Features of the Aegis Vape
GeekVape Aegis vapes incorporate crucial protections: over-discharge, over-charge, short circuit, and temperature control, ensuring a safe vaping experience for all users.
Over-Discharge Protection
GeekVape Aegis devices feature robust over-discharge protection, a critical safety mechanism. This prevents the battery from draining too low, which could cause damage or render it unusable. The device automatically shuts down before reaching a harmful discharge level, preserving battery health and preventing potential hazards. Consistent monitoring ensures safe operation, extending the lifespan of your Aegis vape’s power source. User manuals emphasize this feature for prolonged device reliability and user safety, as detailed by Vaper Club resources.
Over-Charge Protection
GeekVape Aegis vapes incorporate essential over-charge protection circuitry. This vital safety feature prevents damage to the battery caused by excessive charging. The device intelligently ceases charging once the battery reaches full capacity, safeguarding against overheating and potential hazards. This protection mechanism, highlighted in user manuals from Vaper Club, ensures the longevity of your battery and promotes safe vaping practices. Consistent use of appropriate charging methods further enhances this protective functionality.
Short Circuit Protection
GeekVape Aegis devices are engineered with robust short circuit protection. This critical safety feature immediately cuts off power in the event of a short circuit within the device or connected atomizer. This prevents potential hazards like overheating, fire, or damage to the internal components. User manuals from Vaper Club emphasize this protection as a key safety aspect, ensuring a secure vaping experience. Proper coil installation and avoiding damaged components are crucial for maintaining this safeguard.
Temperature Protection
GeekVape Aegis vapes incorporate advanced temperature protection systems. These systems actively monitor the device’s internal temperature, preventing overheating during operation. Should the temperature exceed safe limits, the device will automatically reduce power or shut down entirely. This safeguard, highlighted in Vaper Club’s resources, protects both the device and the user. Consistent performance and longevity are maintained through this crucial safety feature, ensuring a reliable vaping experience.

Troubleshooting Common Issues
GeekVape Aegis devices may experience issues like failing to power on, lack of vapor, burning tastes, or leakage – solutions are vital for optimal use.
Device Won’t Turn On
If your GeekVape Aegis device fails to power on, first ensure it’s adequately charged. Connect it to a power source and allow sufficient charging time. Verify the battery installation is correct – for Aegis Legend models, confirm proper polarity and secure contact.
If charging doesn’t resolve the issue, attempt a reset by quickly pressing the power button five times. Check for any physical damage to the device or charging port. Refer to the Vaper Club manual for specific troubleshooting steps related to your Aegis model.
No Vapor Production
Experiencing no vapor with your GeekVape Aegis? First, confirm the device is powered on and set to an appropriate wattage. Ensure the coil is properly installed and adequately primed with e-liquid – a dry hit can cause immediate failure.
Check the pod or tank for leaks or obstructions; Verify sufficient e-liquid remains. If issues persist, try a new coil. Consult the Vaper Club manual for model-specific guidance on coil compatibility and troubleshooting.
Burning Taste
A burning taste typically indicates a dry hit – the coil is overheating due to insufficient e-liquid. Immediately stop vaping! Ensure your pod or tank is adequately filled and the coil is thoroughly saturated with e-liquid before resuming.
Reduce the wattage setting, as higher power levels accelerate e-liquid vaporization. If the taste persists with a new coil and sufficient liquid, consult the GeekVape Aegis manual from Vaper Club for further assistance.
Leakage Problems
Leakage can occur from improperly sealed pods/tanks or damaged O-rings. Ensure the pod or tank is securely attached to the device, referencing the GeekVape Aegis manual from Vaper Club for correct installation.
Check O-rings for wear and tear, replacing them if necessary. Avoid overfilling the pod/tank, and ensure the device is stored upright to prevent e-liquid from seeping into the airflow channels.

Advanced Settings and Customization
Aegis vapes allow wattage and temperature adjustments, user profile settings, and screen brightness control for a personalized vaping experience, as detailed in manuals.
Adjusting Wattage and Temperature
Wattage adjustment on the GeekVape Aegis is crucial for tailoring your vape’s intensity. Utilize the ‘Up’ and ‘Down’ buttons to incrementally increase or decrease power output, observing the display screen for precise readings.
Temperature Control (TC) mode requires coil compatibility and proper settings. Adjust the temperature using the same buttons, ensuring it aligns with your coil’s specifications to prevent dry hits or burning. Refer to your coil’s documentation for optimal temperature ranges. Careful adjustment enhances flavor and longevity.
Setting User Profiles
User profiles on the GeekVape Aegis allow for personalized vaping experiences. Save preferred wattage, temperature control, and other settings for different e-liquids or coils. Access the menu system, typically via the ‘Select’ button, and navigate to the profile settings.
Create, edit, and delete profiles to quickly switch between customized configurations. This feature eliminates the need to repeatedly adjust settings, streamlining your vaping routine and ensuring consistent enjoyment. Explore the manual for specific navigation steps.
Screen Brightness Adjustment
Adjusting screen brightness enhances visibility in various lighting conditions. Access the settings menu, usually through the ‘Select’ button, and locate the display options. Many Aegis models offer multiple brightness levels, allowing you to customize the screen to your preference.
Lowering brightness conserves battery life, while increasing it improves readability outdoors. Refer to your specific Aegis model’s manual for detailed instructions on navigating the menu and adjusting the screen brightness effectively.
Firmware Updates
Regular firmware updates are crucial for optimal performance and new features. Check GeekVape’s official website for available updates for your specific Aegis model.
Checking for Updates
To verify firmware availability, regularly visit the official GeekVape website. Navigate to the support section and locate your specific Aegis device model – Legend, Boost, or others. Downloadable updates, along with detailed instructions, are typically provided there. Alternatively, some Aegis devices may prompt you directly on the screen when a new firmware version is released. Always ensure a stable connection during the checking process to guarantee accurate results and prevent interruptions.
Updating the Device Firmware
Firmware updates enhance device performance and stability. Download the latest version from GeekVape’s official website, ensuring it matches your Aegis model. Transfer the file to your device, typically via USB connection. Follow the on-screen prompts carefully during the installation process; do not interrupt it. A successful update will usually display a confirmation message. A stable power source is crucial throughout to avoid potential bricking.

Cleaning and Maintenance
Regular cleaning ensures optimal performance. Wipe down the device and store it properly to maintain longevity, avoiding exposure to extreme temperatures or humidity.
Regular Cleaning Procedures
To maintain your GeekVape Aegis, regularly wipe down the exterior with a soft, dry cloth. Avoid abrasive cleaners or excessive moisture. For the pod or tank connections, use a cotton swab lightly dampened with isopropyl alcohol to remove any e-liquid residue. Ensure all components are completely dry before reassembly. Consistent cleaning prevents buildup and ensures optimal vapor production, extending the device’s lifespan and preserving its performance as outlined in user guides.
Proper Storage Techniques
When storing your GeekVape Aegis, ensure it’s in a cool, dry place away from direct sunlight and extreme temperatures. Remove the pod or tank and empty any remaining e-liquid to prevent leaks. Avoid storing with batteries installed for extended periods; store batteries separately in a safe container. Proper storage safeguards the device from potential damage and maintains its functionality, preserving its longevity as detailed in available user manuals.
Warranty Information
GeekVape offers warranty details for their Aegis devices; consult their official channels for specifics on claim procedures and coverage terms, ensuring device protection.
GeekVape Warranty Details
GeekVape’s warranty policies, while specifics require direct verification through their official website or authorized retailers, generally cover defects in materials and workmanship. This doesn’t typically include user-induced damage, like drops or misuse. Warranty periods vary by product and region, so retaining proof of purchase is crucial. Claims usually involve submitting photos or videos demonstrating the defect, alongside purchase verification. GeekVape aims for prompt resolution, offering repair or replacement as appropriate, adhering to their terms and conditions.
How to Claim Warranty
To initiate a GeekVape warranty claim, first, gather your proof of purchase. Contact GeekVape’s customer support or an authorized retailer, detailing the defect and providing photos/videos. They’ll likely issue a Return Merchandise Authorization (RMA) number and instructions for shipping. Ensure secure packaging to prevent further damage during transit. Warranty claims are assessed upon receipt; repair or replacement depends on the defect and warranty terms. Keep all communication records for tracking purposes.